Showing posts with label decoration. Show all posts

Saturday, October 16, 2010

Wedding cake, phase 3: the final decorations

Around 1:00 pm yesterday afternoon Andrew and I headed over to his grandmother's house where the cake was being kept. Once again, things didn't go exactly as I planned. I learned something yesterday (that would have been helpful to have known earlier): there's a huge difference in the colouring abilities of Wilton gel products. The ones in the small tubes are not effective in colouring fondant--these are also what I tried to use on Wednesday. We attempted to transform the white fondant I'd purchased into vibrant reds, yellows, and oranges for leaves, but were only coming up with pastel pinks, and peaches--no good.
The cake, uncovered. I really wasn't happy with the base fondant colour, but now I know what to use in the future.
When Andrew had gone through the entire tube of orange we agreed we needed something else, so off he went to the Bulk Barn (thankfully only a couple of blocks away). He came back with more tube colourings, and also with the type of Wilton colouring that comes in little jars. I'm not sure what the difference is, I didn't look at the labels, but apparently I should have been using the jar colouring all along. We got the nice dark colours we wanted without using all of the gel.

Once we'd sorted the colour problem out we were on our way. I started cutting out leaves with various sizes of cookie cutters and drew little veins into them with a nut-pick. Then I placed them into an empty egg carton so they would curl like real leaves. Once I'd prepared a small selection of shaped leaves, I took the assortment of orange leaves Andrew had prepared and arranged them on the cake. As I stuck them to the cake, Andrew continued onto the yellow and red fondant, and after I thought I had enough of the other colours we marbled the leftovers together.
Leaves drying so they will rest curled on the cake,
Andrew, cutting out leaves.
The cake, with its first layer of orange leaves.
Two colours of leaves applied.
The cake, more-or-less completed, just a few finishing touches to go.
The second thing that didn't work out like I would have liked was how I arranged the leaves. Initially I thought I would create a spiral of leaves around the entire cake, but as I laid the decorations out I ended up covering half the cake and the other was bare. The cover side looked great, while the other half did not--surprised? Probably not, so then we had to roll out what was left of the coloured fondant and cut out as many new leaves as we could.
All colours of leaves applied.
A close up of the top.
Overall, I'm happy with the way the cake turned out. The bronze under-colour seems to photograph better than it looks in real life, but that's also part of why I decided to cover the entire cake. Ideally, I would like to take another cake decorating course, one for wedding cakes from NAIT so I can learn more advanced fondant techniques--we'll see if I ever get the time. Maybe next summer?

Ciao,

Andrea

Wednesday, October 13, 2010

Wedding cake, phase 2: covering

My parent’s internet was working yesterday (hurray for country living), therefore I couldn’t blog about my square baking experience. I thought since I still had three more types of squares to make, I would wait to write about them until I was all done. Today I worked on applying coverings to the cake; both icing and fondant. It took me all day starting around 9:00 am and I worked (more-or-less) straight through until 4:30 pm. I decided based on my previous cake making that one regular recipe of Swiss Meringue would be sufficient to cover all of the cake layers. The nice thing this time was that I had a proper stand mixer that was able to handle all 3 pounds of butter required at one time.
The first step of the icing, warming the egg whites and sugar on a double broiler.
The icing, all whipped up and ready to be spread.
By 10:00 am--possibly earlier, I can’t remember--I was applying the first layer of icing to the smallest layer of cake, which didn’t required support. Andrew was kind enough to spend much of the first part of his morning sawing doweling pieces and sanding off the rough bits so I could insert them into the cake. This was one bit of the construction I wasn’t too sure about, but I’d seen it done in an instructional video I’d watched to make sure the lower levels of the cake could uphold the top ones. I really don’t want the cake to collapse on itself.
Andrew measuring out the distances for the support doweling.
The icing process went along pretty smoothly, by which I mean I was able to speed along in the application, then spread the icing out so it was even and...smooth. It turned out I was just about spot on with the amount of icing required as I have only a small tub of it left, and I can use that to apply the ribbon or other decorations if necessary. The fondant was a bit of a pain...not really the rolling and setting part, but the colouring part.
Me applying the last layer of icing to the base layer of the cake.
What's left of the buttercream icing after four layers of cake.
In my mind I was going to create a nice, beige colour for the base. However, no matter how much brown colouring I added, the fondant didn’t get anywhere near brown, it just became a light pink--definitely not what I was looking for. Then when I rolled the first layer out I realized that I wouldn’t be able to cover the entire cake with the 3L of fondant I’d prepared. So, off came the first layer, and out came the remaining litre of fondant. I ended up with a pale peach colour that seemed passable, then when I decided to add my bronze sparkles to the fondant it became even more passable.
Me, adding the fondant, see how fast I move? My hand is blurry.
The base layer, sitting on the cake plate, covered in fondant.
Now all I’ve got to do is add ribbon, more sparkles and leaves. I’m sure this will take longer than I think, but not nearly as long as the first part of the icing.

Ciao,

Andrea

Monday, October 11, 2010

Wedding cake, phase 1: baking

Welcome to Andrea's Wide World of Baking! Today I bring you the process of baking enough chocolate cake to serve 100 people.

Err...or something like that. Yes, I'm coming up to the judgment day to see if I can really bake and decorate a wedding cake. I can tell you that the baking part went peachy-keen--really. After a good sleep last night, I woke up this morning around 8:20, had a quick bite of breakfast, and started on the first batch of batter. I made 6 times the recipe I used for the previous chocolate cake, in three rounds of mixing. I used something like 20 eggs, 3 lbs of butter, more than 4 kg of brown sugar, and approximately 1.5 kg of flour. Pan dimensions are 14", 12", 10", and 8" wide.

The main ingredients going into the cake.
Me trying to mix up the last of the first batch of cake batter, and trying not to over flow the bowl.
The batter. Mmm, chocolate.
The first cake pan, ready to go in the oven.
Two of the cake layers baking.
The mess after I'd finished mixing the batter.
The biggest layer (14") just out of the oven.
At this point in the afternoon (as I write it is 2:30 pm) all of the cake layers are out of the oven, and are cooling. They're a little crumbly on the outside, but that's why you lay down a quick 'crumb' layer of icing first, to seal the cake. Unfortunately, one of the cake layers (the second largest one--12") is still stuck in the pan and I'm not quite sure how I should proceed to get it out. I'm sure I'll work something out, I just hope I don't break it as I do.

Ciao,

Andrea

Tomorrow: baking enough square for 100 people.

Sunday, September 26, 2010

Cake decorating: the second to last post...I promise*

Last weekend (Sept 18th) Andrew and I held a "Let's eat cake party," with the purpose of letting me practice the cake I planned to make for my brother-in-law's wedding reception in October. It had a secondary purpose, which was to use up the fondant I had leftover from the cake decorating course I took a couple of weeks ago.

The Cake:

After poking around on a couple of recipe Websites, I found a chocolate cake recipe that I thought: a) looked delicious; and b) would be solid enough to hold up a second layer of cake (the only directions I've been given on the cake is that it should be chocolate). I used this chocolate cake recipe from Epicurious. I baked it the weekend before and slipped it into the freezer so that I wouldn't have to worry about the construction of the cake during the week leading up to the party. The general consensus on the cake was that it was delicious, and I have to agree. This probably had something to do with the amounts of butter, sugar, and eggs that went into it, but hey, it's cake, it's not supposed to be healthy. And from my baker/decorator view point, the cake came out relatively flat (not that it didn't rise, but that it didn't have a huge rounded top like the banana one I made as the smaller, second layer), was easy to slice, and wasn't too crumbly to make icing difficult.

The Icing:

What I mean by icing is the buttercream icing layer that went on the cake before the fondant. Buttercream icing is a lot like you might imagine, full of creamed butter. I had never made this type of icing before, since when I took the cake decorating courses it was always pre-made for us. I located a recipe on the Epicurious site for Swiss Meringue, which was what we were instructed to use at the cake decorating courses. The icing has three ingredients: egg whites, sugar and butter. First you heat the egg whites and the sugar in a double boiler until they reach a certain temperature, then you beat the mixture until they reach a soft, foamy, not-quite-soft-peaks consistency, then you add the butter. I only have a hand mixer, so I was a little worried about whether or not it would be able to manage creaming 1.5 pounds of butter, but it worked without a hitch (I also took the butter out of the fridge in the morning before I went to work, so it was very soft). Finally, I tried adding a little amaretto for flavour, but it didn't seem to make much of a difference. It was richly decadent nonetheless.
First layer of icing (of three...) to go on the cake. Each layer sets in the fridge in between icing.
The buttercream icing. Despite halving the recipe I still had leftover.
Me icing the cake. Probably the third layer by the looks of things.
The banana cake layer all iced and ready for fondant.

The Fondant:

As mentioned above, the fondant was the leftover from my decorating course a few weeks ago, therefore the colours on this cake are a little wacked-out. When I do the actual cake I intend to do a light brown-beige colour for the background, then red, orange, and yellow for the leaves. Yes--the cake will be decorated with leaves rather than stars. I would have done leaves this weekend, except that for some reason Bulk Barn had tons of Hallowe'en cookie cutters, and no autumn sets. Since last weekend I've managed to procure a set of fall-themed cookie cutters from Michaels that has three different sizes of oak and maple leaves. I'm also planning to hand-imprint the leaves with veins to make them look more realistic, and maybe curl the edges on some of them so they aren't all lying perfectly flat, as real leaves wouldn't.
The chocolate layer iced, and trimmed with fondant. I managed to get it on with almost no difficulties.
Me applying the fondant to the banana layer. This one went on perfectly. No tears anywhere.
The boarder applied to hide a small gap between the cakes. The green fondant rolled out and ready to make stars.
First colour added, working on cutting out stars for the second set of trimmings.
Almost there, just purple left. I found at this stage I could move quickly through the decorating.
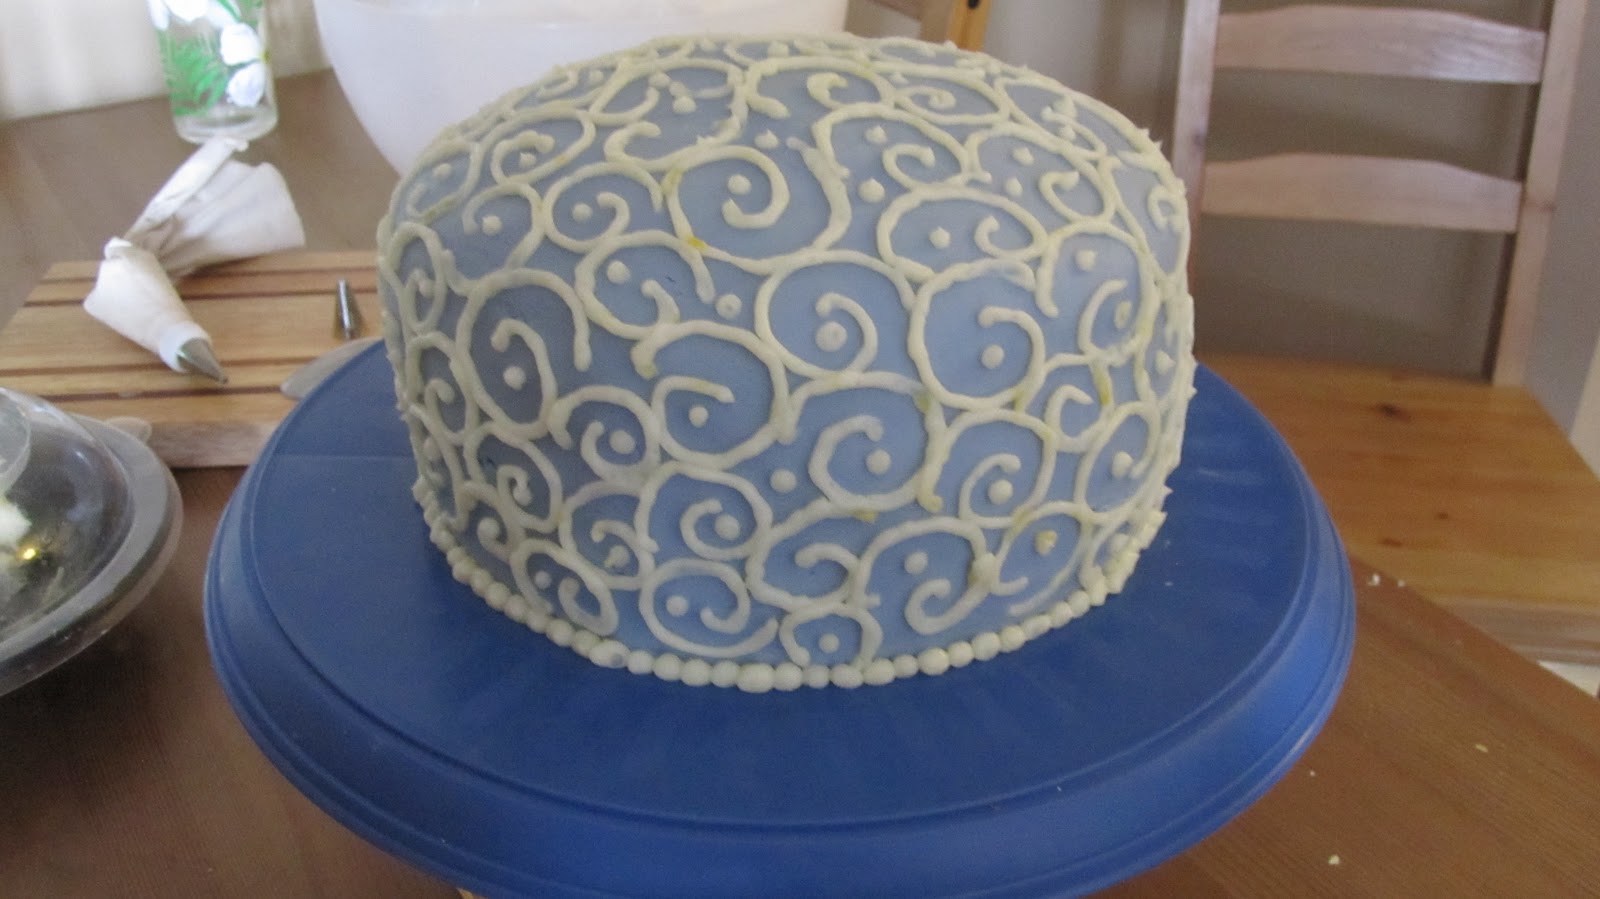
The finished product.

Ciao,

Andrea

*at least until the next big cake baking/project comes around...

Sunday, August 1, 2010

My own cake wreck

After a very successful experimentation with rolled fondant for my own birthday cake, I figured that putting together Andrew's birthday cake would be a sinch. I wasn't even going to do fondant, but try making chocolate leaves (something I saw in a Find Cooking magazine). Alas, this is the third birthday cake for Andrew in a row I've ruined. Our first year out here (when I say out here, I mean in Alberta) I made a butterscotch chiffon cake, which is a Milne family recipe. That was before I got into making cakes, so there's no picture. The second year I made a maple walnut cake out of a Canadian Living magazine (pictured below). The year after was the year the Canadian Space Agency was looking for astronauts (Andrew just missed making the cut for interviews) so I made a space shuttle cake (i.e. a cake in the shape of a shuttle). It tasted okay, but I didn't have black food colouring, so I had to trim the cake with blue--it didn't quite look the way I had wanted it too (no picture). Last year I made a red velvet cake. Again, the cake was excessively delicious...all that red food dye...but the decorating...oh boy. I wanted to go with another space theme, so I tried to use marshmellows to make stars (initially thinking I could use toothpicks to make them look like they were shooting out from the cake), but the icing colour went out of wack. It ended up neon. I was sorely disappointed (definitely no picture).

The last good cake I made for Andrew, a maple walnut cake (including candied walnuts on the top).

To Andrew, my lovely husband, I sorely apologize. For the third year in a row I botched your birthday cake. I swear, upon pain up death, I will get it right next year.

What happened this year? Well, the first problem was that I felt rushed. Between training for the marathon, completing house cleaning chores, trying to get some writing in, and playing a double header of soccer on Tuesday night, I had to squeeze icing and decorating the cake into the leftover time. Second, the chocolate leaves didn't work. I'm not sure if it was due to low quality of chocolate (cheep melting chocolate from Michaels) or that fake leaves aren't suited as a mold. Either way, I had difficulty spreading the chocolate evenly, then when it set it cracked as I tried to remove the leaves. Third, the raspberry filling I used to separate the cake layers wouldn't thicken sufficiently so that it squirted out when I added the top half. Finally, and most disastrously, the icing wouldn't thicken. I used an icing recipe from Fine Cooking, where you melt chocolate with butter, and cream, then let it thicken and cool before applying it to the cake. As I prepared the icing on Wednesday I read the recipe and noted that it used plain sugar for sweetening rather than icing sugar. This is the conversation I had with myself: White sugar, granulated sugar, is that right? Better check it again. Yup, okay, granulated sugar. I should probably use icing sugar to help it thicken better. Hm, but I've made this type of icing before, I should just follow the recipe it will be fine. Trust the recipe, the people at Fine Cooking know what they're doing. This is what happened:

Doesn't that look delightful? It's like the cake has been slimed.

Despite an entire day in the fridge it never thickened sufficiently.

Sure, it looked terrible, but at least it tasted good.


To John and Cindy, if either if you are reading this blog post: THIS WILL NOT HAPPEN TO YOUR CAKE. I promise. I'm scheduled to take a couple of cake decorating courses at the end of this month. One on regular cake decorating, how to make icing, basic piping techniques, etc. The second is on rolled fondant. Also, I will make sure to start on your cake as soon as I get home in October. I'll bake the cake right away and put it into the freezer until needed. Then I will set aside lots of time for making decorations, etc. It will be beautiful. In the meantime, here are some pictures of cakes that did work out.

I had no piping bags at this point and had to used a plastic bag for the writing. It's pink, 'cause it was for Mandy's birthday.

Honestly, this cake was a bit of a mess, but I spent hours making icing flowers. The roses turned out well.

A chocolate, pepermint cheesecake. Yum.

Birthday cake for my mom a couple of years ago, clearly more successful than the one I made for Andrew...

Finally, my birthday cake.


Ciao,

Andrea

Wednesday, June 2, 2010

Adventures in Cakeland

*I started this post almost two months ago, but was unable to complete it before leaving on our trip. Now here it is, my step-by-step experience with rolled fondant*
 
I've always enjoyed baking and decorating cakes. A few years ago I brought 2 or 3 cakes into work over the course of one summer to celebrate colleagues who were retiring or moving on to new jobs. I would like to take a proper cake decorating course so I can master really fancy techniques like rolled fondant, gum-paste flowers etc, but so far timing has not worked out. This issue is becoming a bit of a concern since last Christmas I offered to do the wedding cake for my brother-in-law. Therefore, for my birthday I decided to try my hand at rolled fondant.


The base cake was lemon with a lemon curd filling. The triple lemon cake recipe came from Fine Cooking. In hindsight, I wish I had evened out the bottom half of the cake since when I stacked all the layers up, the top half of the cake slid around on the rounded base.


Before adding the rolled fondant I put down a layer of regular icing. Again I used the recipe from Fine Cooking, to complete the triple lemon flavouring. This preliminary spread of icing helped keep the top half of the cake more-or-less in place.


I prepared the rolled fondant the night before by following a recipe off of the Wilton Website. I wasn't quite sure when to stop adding icing sugar to the fondant as I'd never made it before, nor been present when someone else was making it. As a result my fondant was a little stiff, but it seems to have worked out more-or-less. I coloured it a light purple-blue with icing colouring purchased from Michaels. I think it was a garden colours kit. Finally, I had some difficulty with the fondant sticking to my counter, so I laid down a large piece of parchment paper to keep it from getting stuck. It also made the transfer of the fondant to the cake relatively simple.


The fondant transferred and smoothed (relatively). I had some problems getting it totally smooth and I wound up with an unsightly wrinkled section at the back where I couldn't ease out the fondant. I also ended up with some cracks, again suggesting that I'd added too much icing sugar.


The completed cake. Swirls are sort of my fall back when I don't know what else to do for a design. I used left over lemon icing for the pattern. It probably took me no more than twenty-five minutes to do, which was a relief as I was worried the decorating would take an hour. Overall I think it was a very pretty cake, and it tasted delicious.

Ciao,

Andrea